Install Centos Install Solr
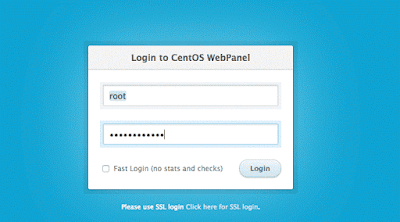
Step 1 :- $ Login root
Password :- $ *******
Step 2 :- # yum -y install wget
Step 3 :- # yum -y update
Step 4 :- # reboot
Step 5 :- # cd /usr/local/src/
Step 6 :- # wget http://centos-webpanel.com/cwp-latest
Step 7 :- # sh cwp-latest


First thing first, install CWP and login to CWP dashboard as root or a user with root privilege via http://your-ip:2030


Name servers (NS) are often called DSN servers, every web site has two name servers to which it is pointed. Setting up NS must be done at both domain registrar and hosting account (server-end). In CWP you can define your default NS by going to DNS Functions >> Edit Nameservers IPs. Enter your desired Nameservers and put your server’s IP next to each followed by clicking Save Changes button. See illustration below:
Once done, you’ll see this message:
Now do not forget to register those two NameServers (NS) to your domain registrar. Consult directly to your domain registrar if you confused on how to set it up.
2. Setup Shared IP
This is very needed. However if you forgot this step then you’ll not be able to host your websites on your server. Yet, even you typed your VPS IP on browser, it will load nothing / inaccessible. This step is also necessary if you have two or more free IPs on your sever so you can define any specific IP of your server to use with ant other users (think as Shared hosting).

3. Setup A Hosting Package
A hosting package is basically just like a web hosting plan you see in many providers. A hosting package contains limitations to resources like Disk space, Bandwidth quota, number of domains / subdomains allowed, etc. Still in CWP, go to Packages and Add a Package. Next, give that package a name and define several limitations followed by clicking the Create button.:
4. Create a User Account
Think your root user (admin) is an account to access WHM so it has ability manage all cPanel accounts (user). Now, create a user account for your own. You’ll use that user to add your domains /websites on your hosting server. Go to User Accounts menu then click New Account. Fill in all necessary fields and options.


Go to CWP Settings then Edit Settings.
Enter your current server IP or free unused IP. Leave Apache port to 80 by default because we don’t have Varnish activated yet. Do not forget to enter your valid email address in the Root

After clicking the Save Changes button, you’ll see a message similar to this:
***********************************************************************************
Once done, you’ll just see a message saying Data Updated!

Switch PHP version
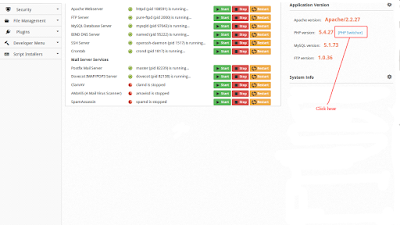
Select version then next

That’s it. Now each time you want to add new website as new domain or addon domain, you can choose whether to create new account or simply use your newly created account.Update PHP version
Enabling SPF and DKIM Keys in Centos Web Panel [CWP]
In this tutorial we will be guiding you on how to enable SPF and DKIM in CentOS Web Panel.
***********************************************************************************
1) Login to CWP (http://your-ip.com:2030)
2) Navigate to Email –> Postfix Manager and tick mark Install DKIM & SPF: and click on Rebuild Mail Server
![Enabling SPF and DKIM Keys in Centos Web Panel [CWP]](https://blogger.googleusercontent.com/img/b/R29vZ2xl/AVvXsEh7GaP0qF1eTL27qkL7tqh8SesdQ6SSOYFb1PljBiraRE0WYr-PPuFrMRA0Nyvln5axRvIHIf3RQFbUOx2rR7RDWwiEY2Pj8sCDJAcRSNnCk6e0IQioY-S58pBq1c1OTqpKn9xY-gRy/s400/cwp-mail-1.png)
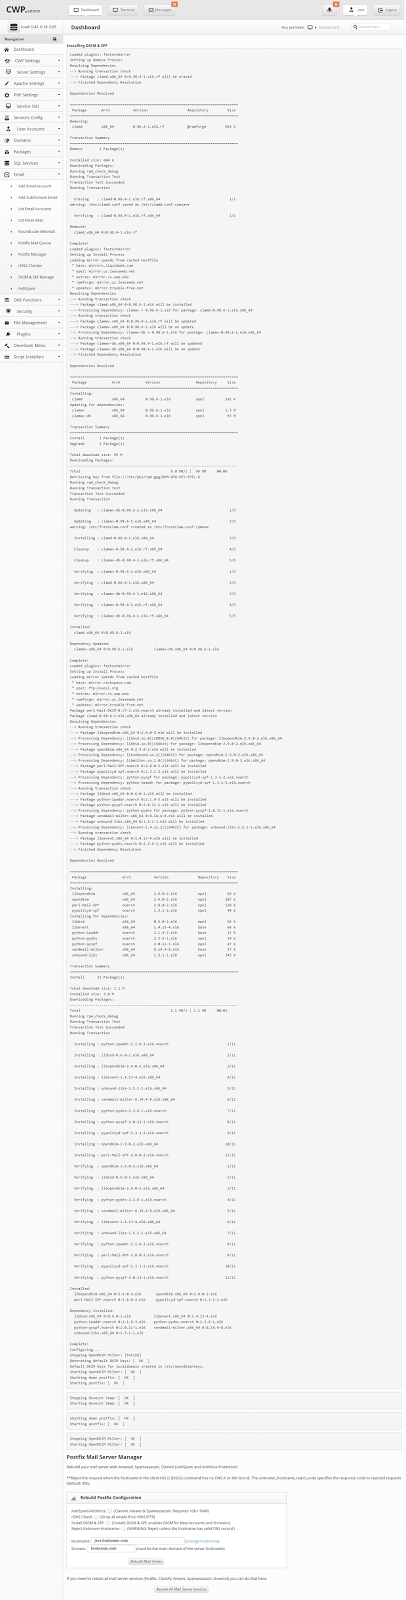
3) Now goto Email –> DKIM and SPF Manage and Select Domain Name, tick enable spf and then click Add DKIM


As you see in above image v=spf1 is not enabled yet. Lets enable SPF manually.
4) Navigate to DNS Function –> List DNS Zones and there you will see your domain name and infront of it there is Edit File button. Click Edit File and Add below entry.
your-domain-name. 14400 IN TXT "v=spf1 +a +mx +your-ip-address ~all"
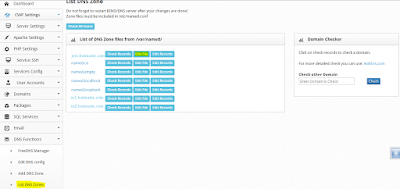

ou have successfully enabled SPF. Now lets make DKIM verification working.
5) open /etc/opendkim/TrustedHosts and add your hostname.
nano /etc/opendkim/TrustedHosts

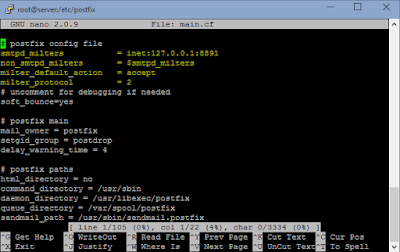
6) open /etc/postfix/main.cf and add the lines below.
nano /etc/postfix/main.cf
smtpd_milters = inet:127.0.0.1:8891
non_smtpd_milters = $smtpd_milters
milter_default_action = accept
milter_protocol = 2
7) Finally restart postfix.
service postfix restart
You are done with enabling SPF and DKIM Keys. Now login to webmail (http://yourdomain.com/webmail) and send email to check-*******@yourmail.com to verify if everything is setup correctly.
*Note: In version 0.91+ you dont need to proceed with point 6 and 7
If you have any trouble on the installation procedures contact me on www.facebook.com/solveubuntu


0 comments:
Post a Comment