Step 1:- Insert an installation DVD and restart Computer. Next, the following screen is shown, then Push Enter key.


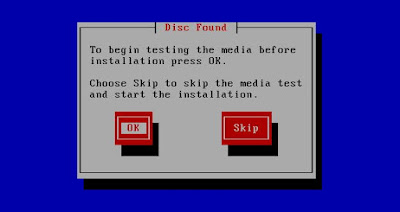
Step 2 :- This is the section to check the installation DVD, Select to check or skip to proceed next.
Step 3 :- Click "Next" button to proceed.

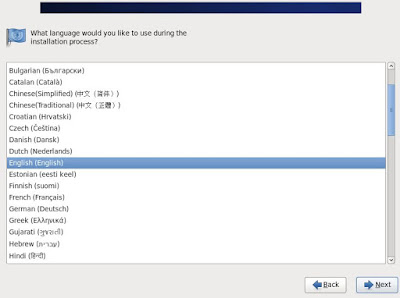
Step 4 :- Select the language you'd like to use during the installation.
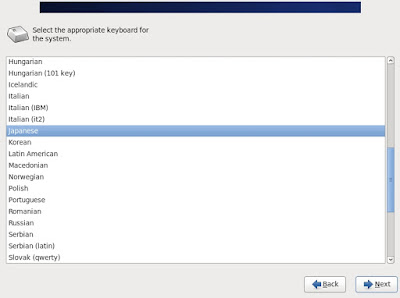
Step 5 :- Select the keyboard type you using.
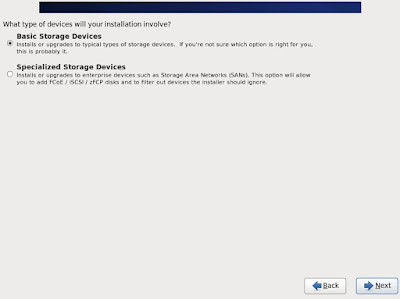
Step 6 :- Select the type of storage. If you install CentOS 6 to local HD, select 'Basic Storage Devices'. If you install to HD that is connected in storage area networks or mainframe, select the bottom.
Step 7 :- Click Yes to proceed if it's no ploblem to remove any data on the HD you try to install.

Step 8 :- Set a Hostname of your computer.

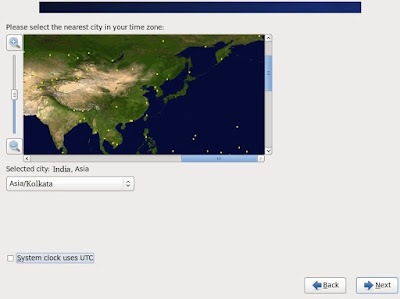
Step 9 :- Set your timezone.
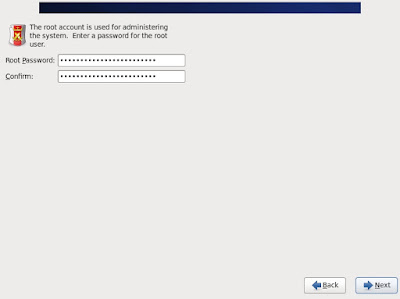
Step 10 :- Set root account's password.
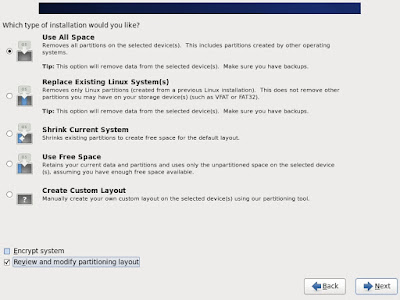
Step 11 :- Select an installation type as follows. On this example, select "Use All Space" and check a box "Review and modify partitioning layout" to configure partitions manually.
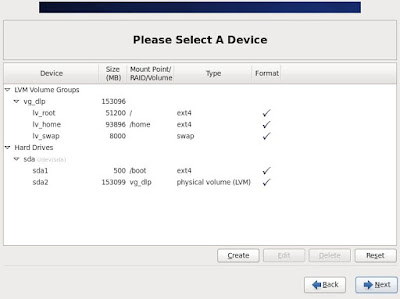
Step 12 :- This is the section for changing partition layouts. This example shows to configure LVM partition layouts (Set /boot, /, /var, /home, swap on here). First, select "/home" and Click "Edit" button.
Step 13 :- Reduce the volume size for "/home" to make free areas.

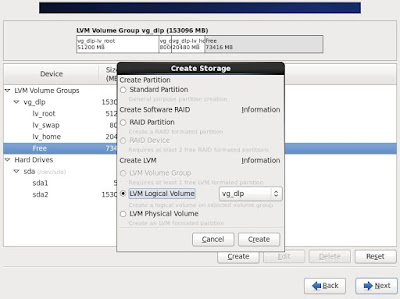
Step 14 :- Click the "Create" button, then following screen is shown, Select "LVM Logical Volume" and Click "Create".
Step 15 :- Input a mount point, logical volume's name, size and so on like follows.

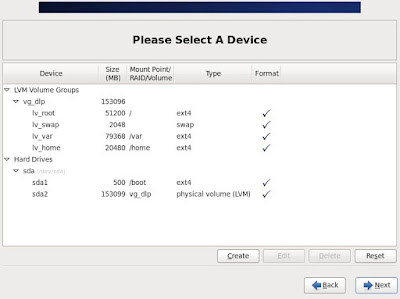
Step 16 :- Click the "Next" button if it's OK all.
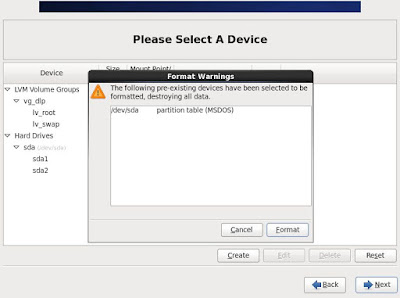
Step 17 :- Click the 'Format' button if it's OK all.
Step 18 :- Click 'Write Changes to Disk' if it's OK all.

Step 19 :- Click the 'Next' button with keeping default. If you set some parameters for bootloader, Configure it.

Step 20 :- Select softwares to install. Select 'Minimal' and go next. It's unnecessarry to install many packages on initial installation.

Step 21 :- Installation starts.

Step 22 :- Installation completed. Click "Reboot" button.

Step 23 :- After rebooting the system, the login prompt is displayed like follows. Login with root account and password you set during installation. Installing CentOS completes if you can login normally.
Step 2 :- This is the section to check the installation DVD, Select to check or skip to proceed next.
Step 3 :- Click "Next" button to proceed.
Step 4 :- Select the language you'd like to use during the installation.
Step 5 :- Select the keyboard type you using.
Step 6 :- Select the type of storage. If you install CentOS 6 to local HD, select 'Basic Storage Devices'. If you install to HD that is connected in storage area networks or mainframe, select the bottom.
Step 7 :- Click Yes to proceed if it's no ploblem to remove any data on the HD you try to install.
Step 8 :- Set a Hostname of your computer.
Step 9 :- Set your timezone.
Step 10 :- Set root account's password.
Step 11 :- Select an installation type as follows. On this example, select "Use All Space" and check a box "Review and modify partitioning layout" to configure partitions manually.
Step 12 :- This is the section for changing partition layouts. This example shows to configure LVM partition layouts (Set /boot, /, /var, /home, swap on here). First, select "/home" and Click "Edit" button.
Step 13 :- Reduce the volume size for "/home" to make free areas.
Step 14 :- Click the "Create" button, then following screen is shown, Select "LVM Logical Volume" and Click "Create".
Step 15 :- Input a mount point, logical volume's name, size and so on like follows.
Step 16 :- Click the "Next" button if it's OK all.
Step 17 :- Click the 'Format' button if it's OK all.
Step 18 :- Click 'Write Changes to Disk' if it's OK all.
Step 19 :- Click the 'Next' button with keeping default. If you set some parameters for bootloader, Configure it.
Step 20 :- Select softwares to install. Select 'Minimal' and go next. It's unnecessarry to install many packages on initial installation.
Step 21 :- Installation starts.
Step 22 :- Installation completed. Click "Reboot" button.
Step 23 :- After rebooting the system, the login prompt is displayed like follows. Login with root account and password you set during installation. Installing CentOS completes if you can login normally.


0 comments:
Post a Comment